Hey craft buddy!
After (what felt like) a LONG winter DIYing inside, I finally got some warmer weather here in Illinois so I could break out my saw! Today we’re making some excellent 1×2 wood DIY projects perfect as DIY home decor! These beginner-friendly wood DIYs also double as wood DIYs to sell for beginners!
I’ll be using a true 1×2 board vs. a 1×2 furring strip. The main difference is the furring strip (while cheaper) has more of a curved edge instead of the square ones of the 1×2 boards. You can see those in this photo below. You can totally opt for furring strips, but your edges may not fit as flush – just a heads up!
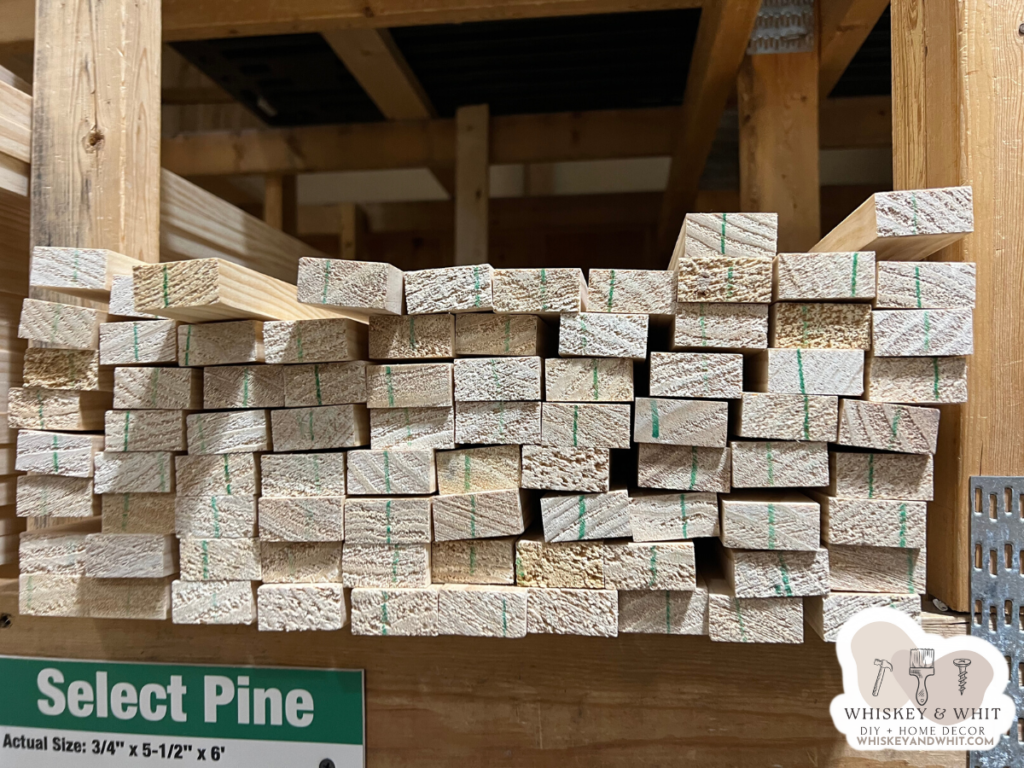
If you’ve never had to go purchase wood before, it can be a little overwhelming so let me break it down for you – today we’re using 1×2 lumber in all of the projects and that means it’s 1” thick by 2” wide. And to make it a bit more confusing, that’s the nominal measurement, not the actual measurement. But don’t worry, I have a full beginner’s guide to wood building video that will explain all of that.
For the 1x2s in today’s video, you can either get 1×2 furring strips, which are going to have a little bit more of a rough texture with rounded sides, or you can go with a 1 by 2 piece of pine that’s going to give you a more squared off Edge.
Because the furring strips aren’t as nice, those are cheaper at $1.25 each, but I decided to pay the extra dollar 50 per board and do the 1x2x8foot long pieces of pine for $2.74 – which I also had to do for some even if I didn’t want to because all the furring strips were way too bowed – so sometimes you pay a little extra to save you time.
As far as selecting boards, when I am looking for wood you don’t want to grab from the top because that’s pretty much everybody else’s rejects I like to play Jenga essentially and go for either the middle or the bottom if I can slide it out.
Pull the pieces out and look down them like I’m showing you here because it’s hard to see just by staring right at a piece of wood if it’s bowed and nothing’s worse than getting home and realizing you have a wonky piece of wood. You can also pull it out and set it on the floor to make sure you have a straight piece of wood.
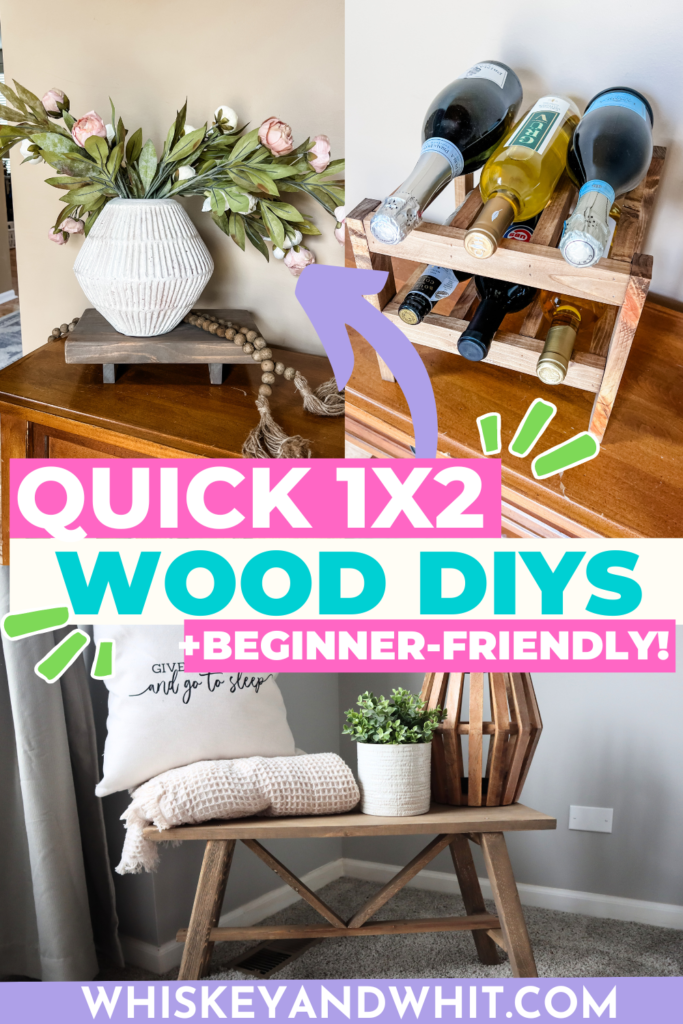
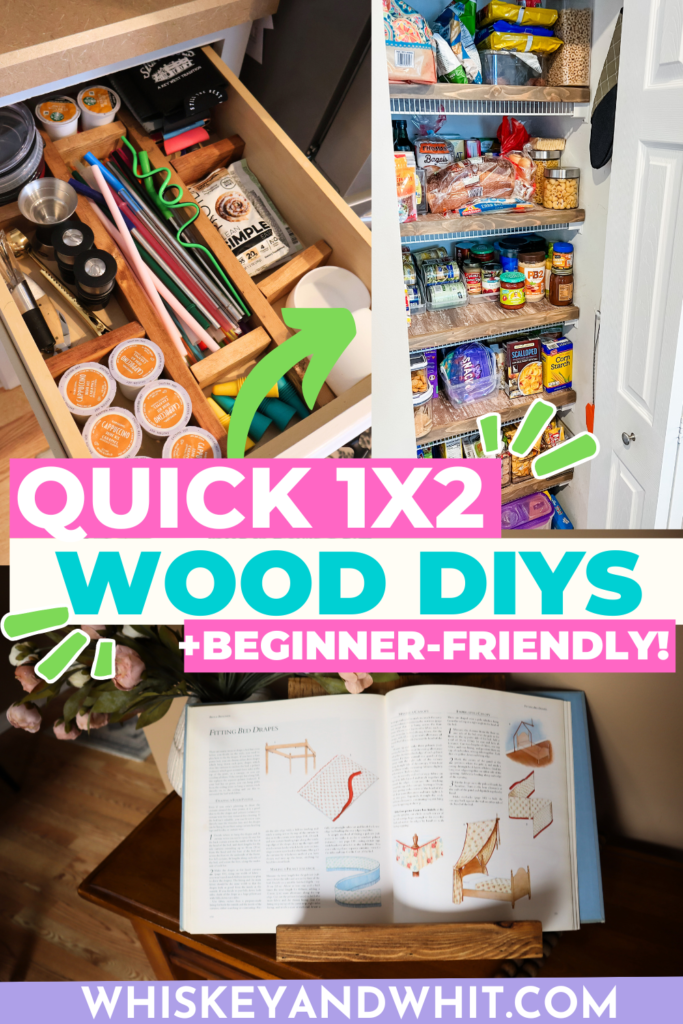
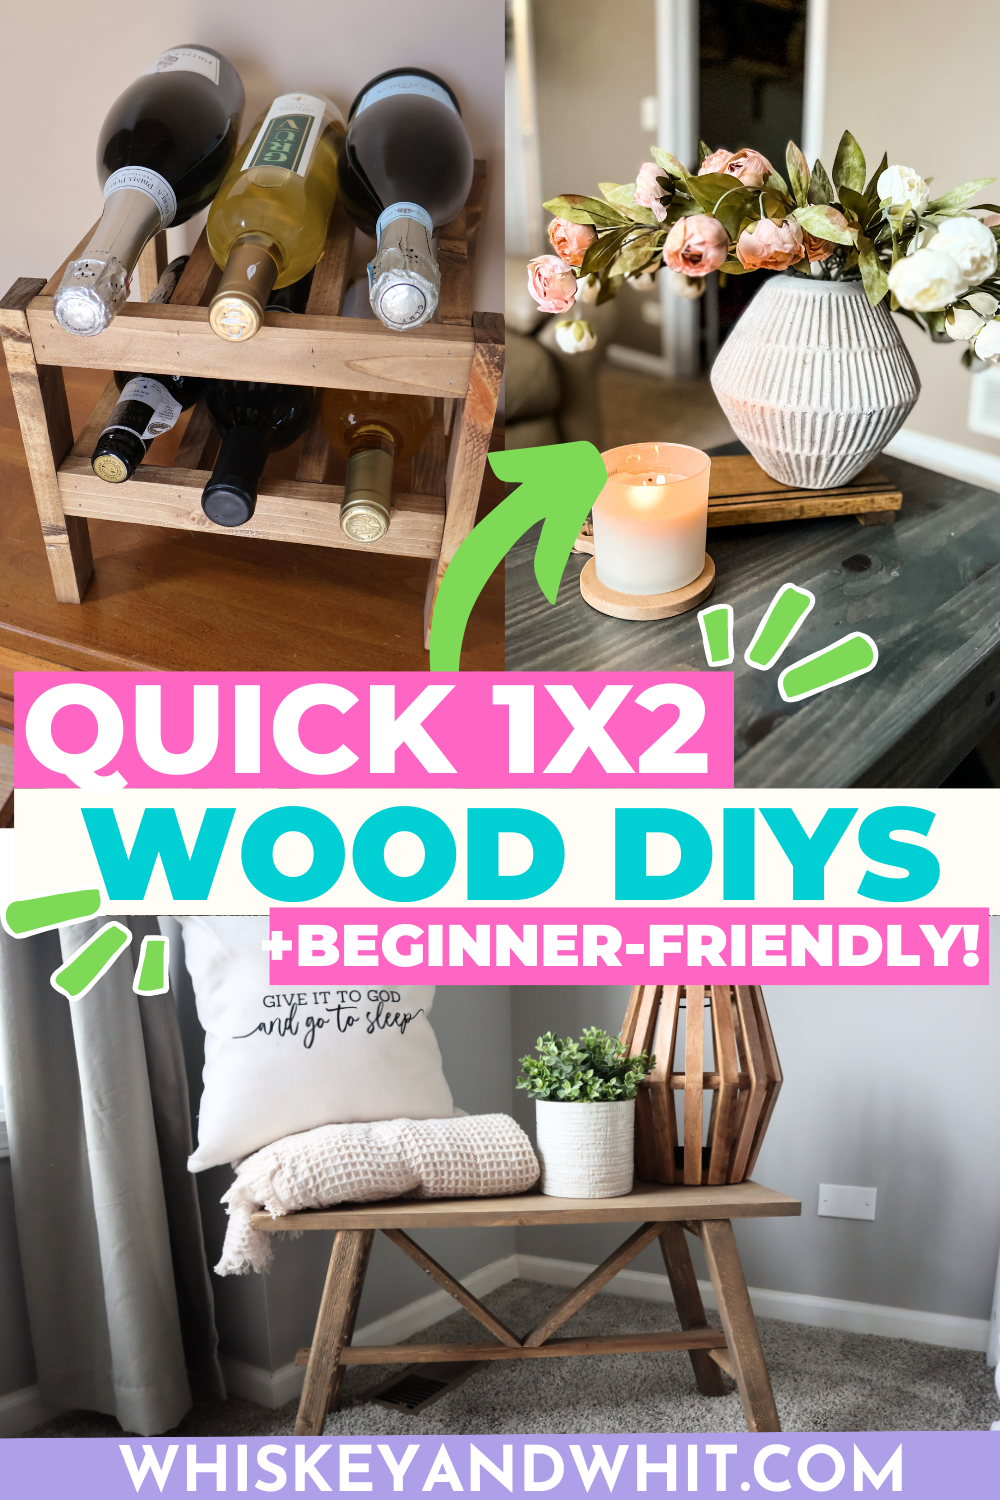
I’m showing you how to make a DIY wood towel rack, a DIY wood blanket ladder, DIY photo ledges, DIY picture art ledges. PLUS I’ll show you some great scrap wood DIYs. My wood crafts and wood decorations are great to make now as the weather gets warmer. This video includes 1×2 wood ideas.
PLUS! As a bonus, I’m sharing some fun tips for those scraps to ensure you can use the entire piece of wood – woo hoo!
These easy DIYs to sell are beginner-friendly and require minimal tools, too! These crafts to make or sell are both beautiful and functional! You’ll have to let me know if you make these wood DIYs to sell for profit!
WATCH THE FULL VIDEO
PIN NOW TO SAVE FOR LATER