

Hey there, craft buddy! Almost 10 years ago, I got my very first Cricut machine—and let’s just say I’ve learned a lot since then. Like… a whole lot. From wasted vinyl to totally botched projects (oops), I’ve had my fair share of trial and error. That’s why I wanted to round up all the Cricut tips and tricks I wish I had known from the beginning—so you can learn from my mistakes and jump right into crafting with confidence.
Whether you’re brand new to Cricut or just want to sharpen your skills, this post is packed with game-changing advice that’ll save you time, money, and stress.
Start Here: Cricut Beginner Essentials
Let’s talk about the very basics. When I started, I thought I needed every supply under the sun. Nope! Here’s what you really need to make a simple vinyl decal:
- Vinyl (sheet or roll)
- Lower tack transfer tape
- Weeding tool
- Scraper tool
- Small measuring tape
- Crafting scissors
- A blank (like a sign, mug, tote, etc.)
- A mat
- Optional but recommended: a brayer!
A brayer is one of those tools I thought was unnecessary… until I actually tried it. It helps your material stick better to your mat, which means cleaner cuts and easier weeding.
🎯 Craft Buddy Tip: A great beginner project is cutting your name in vinyl! Try it with a fun font, use some budget-friendly vinyl, and just practice.
Transfer Tape 101
Not all transfer tape is created equal. Seriously. I learned the hard way that too-sticky tape can ruin your whole project. I now swear by:
- Paper transfer tape from Amazon – gentle and effective.
- Less sticky clear tape options – for when you need visibility but don’t want a wrestling match.
Avoid Cricut-branded transfer tape for intricate designs—it’s way too sticky for most materials.
Save. Your. Scraps.
If you’re tossing your leftover vinyl, you’re missing out! I organize mine in a hanging file box by color (adhesive vinyl and iron-on separately), and it has saved me so much time and money. Many projects can be made entirely from scraps!
Intricate Designs? These Tricks Are Gold.
Here’s what I do to make tiny or detailed designs easier:
- Add an offset in Design Space – This thickens up skinny fonts and makes weeding way less painful.
- Cut using “Iron-On” or “Washi Tape” setting – It’s more precise for intricate cuts.
- Mirror your cardstock cuts – That way, any jagged edges show up on the back.
- Try reverse weeding – Lay transfer tape on top of your vinyl, scrape, then weed the background. It keeps delicate pieces in place.
- Use the hinge method – Tape your decal down the center, peel back one side, apply, and repeat. Great for large projects!
Keep Your Tools Clean
⚡ Myth buster: Poking foil sharpens your blade. Not true! It cleans your blade by removing gunk like adhesive buildup.
To clean your machine:
- Use mild cleaner (no abrasives) to wipe dust and hair.
- Avoid touching the black back band—it’s essential to your machine’s function.
- Clean your mats! I use Dawn Power Wash and a scraper, rinse, and let air dry. You can revive mats about 4–5 times before needing to replace them.
Use the Contour Feature Like a Pro
Working with PNGs or SVGs you want to tweak? The Contour tool lets you hide or remove parts of your design. This is especially helpful if you want to customize colors or simplify shapes before cutting.
You Don’t Have to Pay for Cricut Access
This is a BIG one. Cricut Access is optional. Think of it like Canva—there’s a free version (Design Space), and then Access is a paid upgrade. You can use your Cricut without paying a dime extra. 🙌
My Favorite Free SVG & Font Resources
🖥️ When I’m designing, I’m always hunting for fonts and SVGs. Here are my go-to spots:
- Whiskey & Whit Free File Library – Yep, I’ve got you covered with free seasonal files, printables & more!
- Caluya Designs – A huge library of cute, free SVGs.
- Abbi Kristen Collections, Hey, Let’s Make Stuff, LoveSVG.com, DinosaurMamaSVG
- Design Bundles & Creative Fabrica – Great rotating freebies!
- DaFont.com – Free fonts galore.
- I also have the paid memberships for Design Bundles & Creative Fabrica and I really like them!
Let me know if you want a roundup of my favorite fonts—happy to put a blog post together!
Budget Blanks Are Your Best Friend
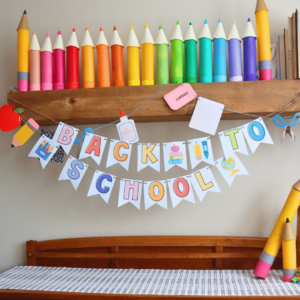
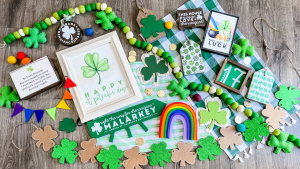
Crafting shouldn’t be stressful—or expensive. When you’re practicing, use cheap blanks from the dollar store or upcycle items. I have an entire Dollar Tree Cricut Blanks Playlist on YouTube for inspiration!
👜 A blank is any item you apply vinyl or HTV to—like mugs, tote bags, signs, clipboards… you name it!
Layer Like a Pro: Registration Boxes + Parchment Paper
If you’re layering vinyl, use:
- Registration boxes – Little squares that help align each layer perfectly.
- Parchment paper – Place between vinyl and your blank to see positioning before it sticks.
Game. Changer.
Final Thoughts
I definitely couldn’t fit 10 years of Cricut lessons into one blog post, but I hope this helps you feel more confident with your machine! If you learned something new, leave a comment and let me know—or share your holy grail Cricut tip with me and the other craft buddies!
Thanks so much for hanging out with me. Happy crafting!


which paper transfer tape on amazon do you use?
Here’s a link for you: https://amzn.to/3ZIeVAY
Thank you for getting back to me so quickly! Love & really appreciate your videos:) Mary