
It is officially the most wonderful time of the year: Christmas craft season! This year I wanted sewing projects that actually earn their spot in your holiday plans. Every one of these is beginner-friendly, useful long after the decorations come down, and makes a sweet handmade gift.
Want to watch me make all five? The full video tutorial is right here:
1. Fabric Advent Chain
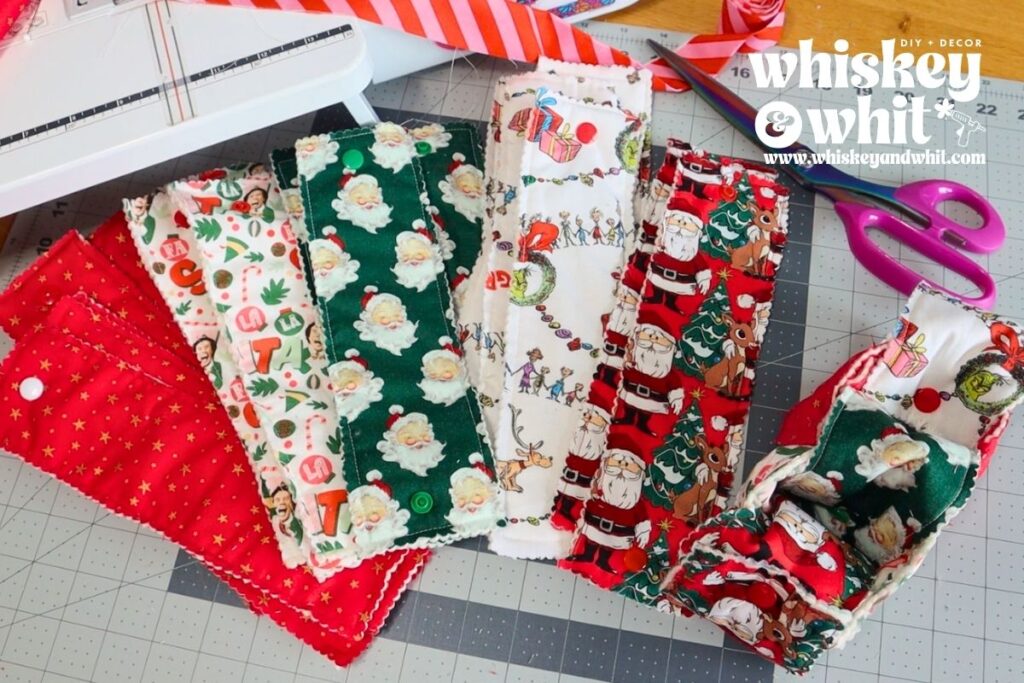
This is a fabric twist on the classic paper chain, and it’s become a favorite countdown tradition at our house. My boys loved it last year, and since it’s fabric, it comes out again every December.
For each loop you’ll need:
- 2 fabric strips, 3″ x 10″ (front and back)
- 1 cotton batting strip, 3″ x 10″
- 1 plastic snap set
I made 24 loops for a full countdown. A strip ruler makes cutting go so much faster: cut a 10″ piece of fabric, then slice your 3″ strips from it.
How to make it:
- Make a sandwich: fabric pretty side out, batting in the middle, fabric pretty side out.
- Sew a 1/4″ seam allowance around the entire outside, pivoting at the corners. You’re just sewing a box.
- Trim the edges with pinking shears. I used scalloped ones from Benzie Design. No turning needed! The pinked edge prevents fraying and gives it a soft, vintage look.
- Add a plastic snap to each end, following your kit’s instructions. Double-check which side each half goes on so your loops snap together the right way.
- Loop each strip through the last one and snap it closed.
2. Kitchen Towel Scarf
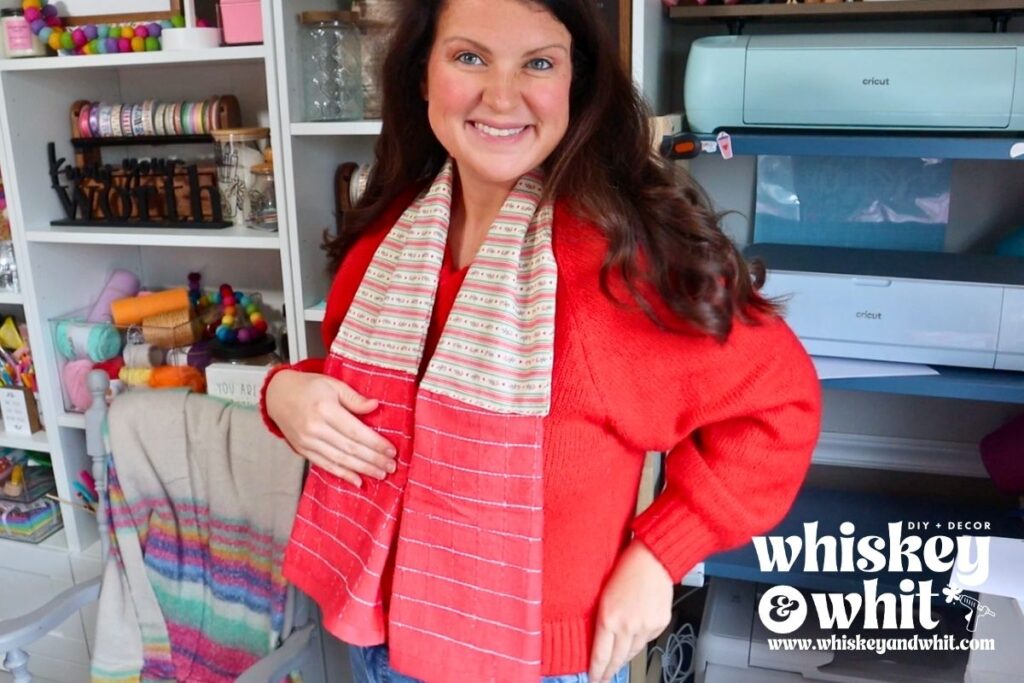
If you bake as I do at Christmas, you know the struggle: your hands are messy and the towel is nowhere to be found. This towel scarf hangs around your neck so it’s always right there.
You’ll need:
- 2 pieces of fabric, 7″ wide x 30″ long
- 1 hand towel, 13″ x 28″ (cut in half lengthwise for two ends)
Using directional fabric? Cut it 7″ wide by 30″ long so the print hangs upright. Otherwise Santa ends up sideways!
How to make it:
- Cut the towel in half lengthwise. Fold each half in half lengthwise to find the middle, then fold each side in toward the center and clip it in place.
- Sew across the top of each folded towel piece so the folds stay put. If the scarf feels too long, stitch further down and trim off the top.
- Place your two fabric pieces pretty side to pretty side, with the prints running the same direction. Fold each short end back to form a hem and press.
- Sew down both long sides with a 1/4″ seam allowance, leaving both ends open. Backstitch at the start and end of each side so your stitches don’t pull apart when you turn it. (Ask me how I know.)
- Turn the tube right side out and press.
- Tuck the sewn end of one towel piece into one end of the tube. Flip the scarf, line up the bottoms of both towels, and tuck the second towel into the other end. Clip.
- Sew straight across each end about 1/4″ from the edge, catching both the fabric and the towel. Matching thread makes this look so clean.
- Optional but worth it: find the center of the scarf for the neck, fold both sides in, and sew a zigzag stitch down the center. It helps the scarf lay flat and makes it more comfortable.
Gift idea: Pair it with a favorite cookbook or a few baking essentials.
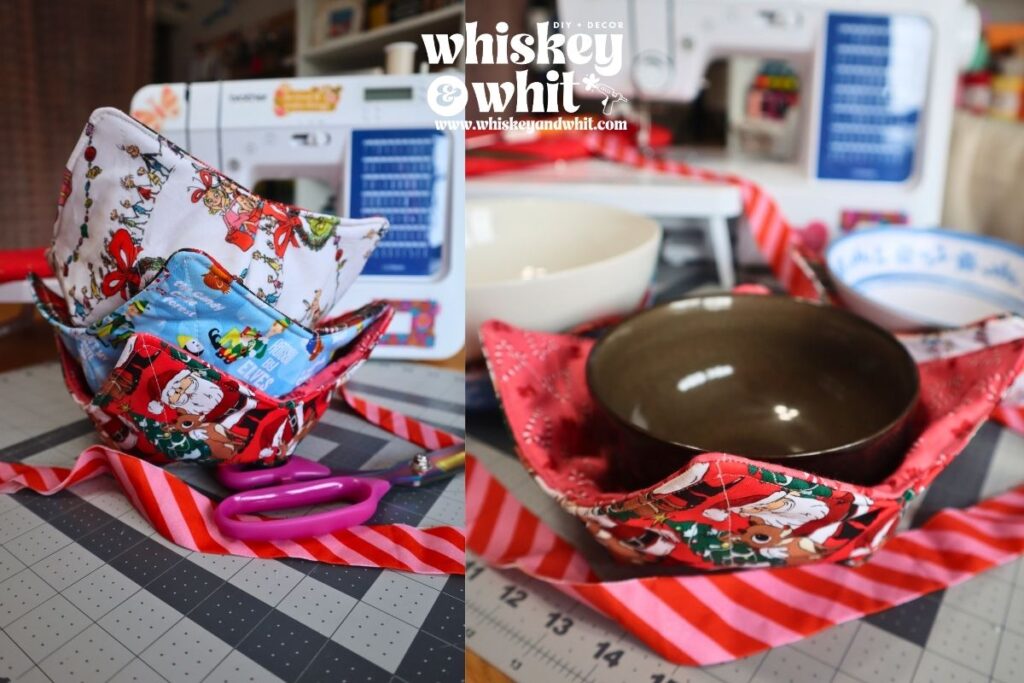
3. Microwave-Safe Bowl Cozies
Soup season is here in the Midwest, and bowl cozies keep your hands from getting burned. They also insulate ice cream bowls during Christmas movie nights, which is how I’ll be using them.
For each cozy you’ll need:
- 2 pieces of 100% cotton fabric, 10″ x 10″ (inner and outer)
- 2 pieces of Pellon Wrap-N-Zap 100% cotton batting, 10″ x 10″
- 100% cotton thread
How to make it:
- Layer one piece of batting with one fabric square on top. Mark an X from corner to corner with a Hera marker or heat-erase pen.
- Sew directly on both lines. If you’re making several, chain-piece them to save time.
- Fold the square in half with the batting on the outside. Measure 1″ up the side and 2″ over on the bottom, then connect the marks with a ruler. This creates the easiest dart you’ve ever seen.
- Sew right on the line, then trim to about 1/4″ to remove bulk.
- Unfold, fold in the opposite direction, and repeat. Smooth the fabric out first so nothing bubbles or goes wonky.
- Repeat steps 1 to 5 with your second fabric and batting. Now you have two bowl shapes.
- Flip the inner bowl into a dome and nest it inside the outer bowl, pretty side to pretty side. Match up the dart seams and corners, then clip.
- Sew a 1/4″ seam around the outside, leaving a 3″ gap for turning. The edge isn’t a perfect square because of the darts, so work section by section around the diagonals.
- Check that every seam caught, trim the corners at an angle, then turn right side out through the gap. Make sure you’re turning between the two fabric layers and not into the batting.
- Push out the edges and topstitch about 1/8″ around the outside, closing the gap as you go. My little red Dritz tool is perfect for tucking in the opening and keeping my fingers back.
Microwave safety: Only microwave cozies made with 100% cotton fabric, 100% cotton thread, and cotton batting like Wrap-N-Zap. If you used polyester thread or a fabric with metallic gold or silver print, skip the microwave and set your hot bowl in the cozy afterward.
4. Quilt As You Go Hot Pad (and Casserole Carrier)
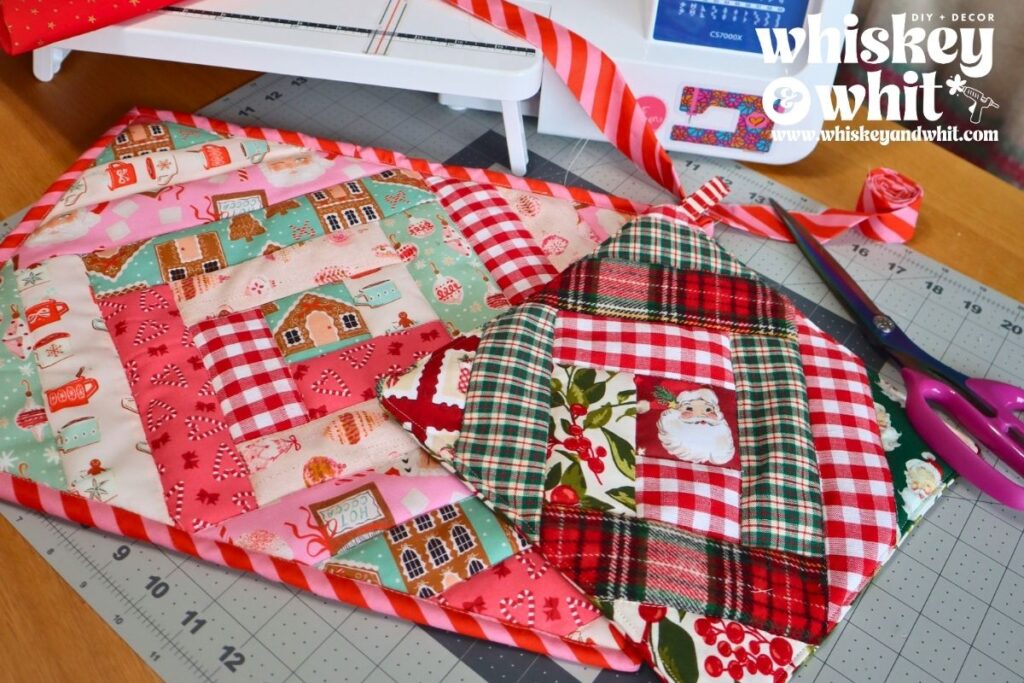
I’ve seen quilt as you go all over my feed and finally tried it. It’s so much easier than I expected, and it’s a fantastic way to use up your scrap bag.
For a 10″ hot pad you’ll need:
- 1 square of Insul-Bright, 10″ x 10″
- 1 fussy cut center square, 2.5″ x 2.5″
- Assorted 2″-wide fabric strips in varying lengths
- 2 squares of 100% cotton batting, 10″ x 10″
- 1 backing fabric square, 10″ x 10″
- 1 scrap strip for the hanger, 4″ x 2″
What’s a fussy cut? Lay an acrylic square over a specific motif on your fabric and cut around it so that image is centered. I fussy cut a Santa from the towel scarf fabric.
For a casserole size that fits a 13×9 pan, I scaled up to about 12″ x 16″.
How to make it:
- Fold the Insul-Bright in half and in half again to find the center. Place your fussy cut square in the center. I set mine on an angle.
- Lay your first strip on one edge of the center square, pretty side to pretty side. Sew a 1/4″ seam only from one end of the square to the other. Don’t sew past it.
- Trim the excess strip, flip it open, and press with a seam roller, your finger, or an iron.
- Add the next strip along the next edge and repeat: sew, trim, flip, press. Keep working around in a circle until the whole square is covered.
- Flip it onto your cutting mat and trim the edges straight using your ruler.
- Baste around the outside about 1/8″ from the edge with a longer stitch so the loose ends lay flat.
- Add a 10″ square of cotton batting to the back for extra protection and puff. Optional: quilt along the lines between your strips.
- For the back, layer your backing fabric on the second batting square and sew an X corner to corner, just like the bowl cozies.
- Make the hanger: press the 4″ x 2″ strip in half lengthwise, open it, fold both edges to the center, press, then fold closed. Stitch down both sides, fold it into a loop, and baste it to a corner of the front.
- Place front and back pretty side to pretty side with the hanger tucked inside. Sew 1/4″ around, leaving a 3″ gap. Keep the gap away from the corners since corners are hard to close later.
- Trim the corners and seam bulk, turn right side out, and press.
- Topstitch between 1/8″ and 1/4″ around the outside, closing the gap.
I skipped binding on this one because so many of you told me you hate binding! If you want to practice, this is a great small project to bind instead.
Note: Insul-Bright is not , so these are for countertops and serving only.
5. Boxy Tote Bag
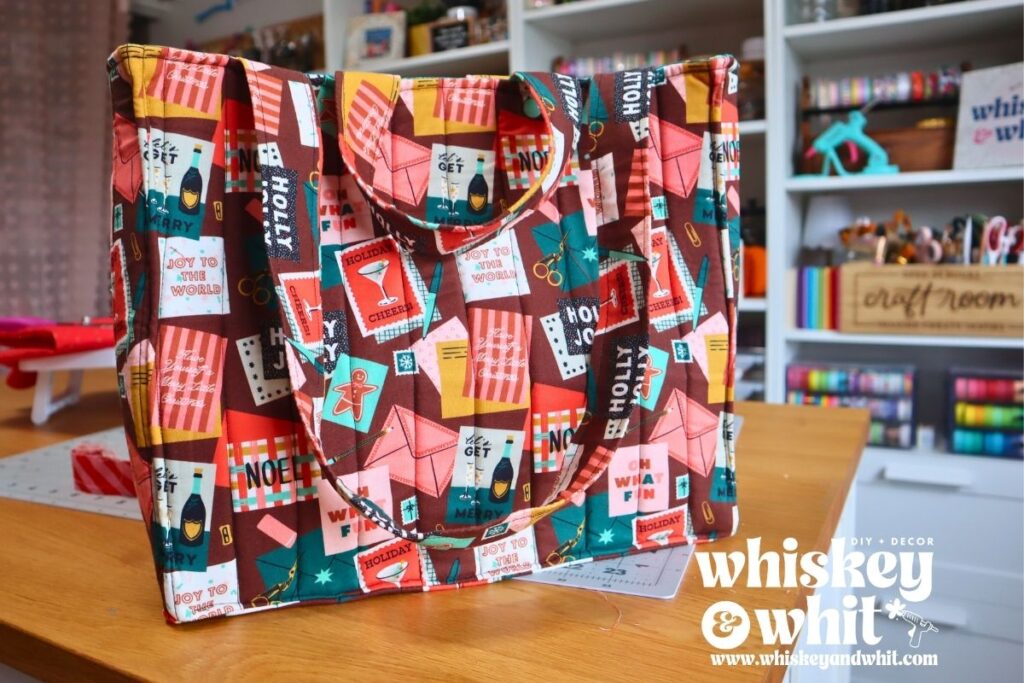
My Halloween rag quilt bag was such a hit that I knew I needed a giftable tote for Christmas. This one has so much structure, two sets of handmade straps, and snaps to keep it closed.
You’ll need:
- Main fabric and lining fabric, each cut into:
- Front & Back – 15″ x 12.5″ (2)
- Sides – 5″ x 12.5″ (2)
- Bottom – 15″ x 5″
- Flex foam for the outer pieces (Pellon Flex Foam or Soft and Stable)
- Fabric for straps: long straps 3×5″ x 28″, short straps 3.5″ x 14″
- 1.5″ polypro or cotton webbing for all straps – (2) 28″ and (2) 14″
- Plastic snaps
Fabric note: the burgundy gingerbread print came from Maggie at Joy in the Seam as an add-on to an advent tag order, and I love how non-traditional it is.
How to make it:
- Attach the foam to each outer fabric piece. Quilt in straight lines using a marker and quilting bar, then trim everything square.
- Straps: fold each strap piece in half lengthwise, pretty sides together, and sew up the long side to make a tube. Turn it right side out (hemostat clips make this easy) and press flat with the seam on one edge.
- Slide the webbing inside the tube, then topstitch 1/4″ down both sides. Webbing inside fabric gives you any color you want with the strength of webbing, without buying a ton of webbing.
- Lay out all outer pieces so the prints face the right way. Sew the front to the bottom, pretty side to pretty side, with a 1/4″ seam. Repeat with the back, making sure the top of both panels faces up when opened.
- Sew a side panel to each end of the bottom.
- Bring the sides up and sew each vertical seam with a 1/4″ seam, starting at the bottom and working up.
- Repeat steps 4 to 6 with the lining, leaving a turning gap in one bottom seam.
- Turn the outer bag right side out and check that all seams and quilting caught.
- Clip the long straps to the outside of the bag, lined up with your quilting lines or about two fingers in from the side seams. Fold the bag in half at the corner seams to match placement on the other side. Then add the short straps. Make sure nothing is twisted.
- With the lining still inside out, slide the outer bag inside it, pretty sides together, sandwiching the straps between the layers. Clip.
- Sew 1/4″ around the top, backstitching over every handle. Let the strap ends peek out past the edge so you know they’re caught.
- Trim the excess strap ends, turn the bag right side out through the lining gap, and sew the gap closed.
- Push the lining inside and topstitch around the top, keeping the handles pointed up and free.
- For the boxy shape, pinch each vertical side seam and stitch 1/4″ from the edge, stopping about 1″ from the top and bottom.
- Add plastic snaps at the top so it stays closed.
Use it as a gift bag, a project bag, or like me, a needlepoint bag!
Which one are you making first?
These were so much fun to put together, and I hope one (or all five!) ends up on your sewing table this season. Tell me which project you’re making in the comments, and if you’d like more holiday sewing, let me know what kind of gifts you want to see next.