Disclaimer: This post contains affiliate links. This means I may earn a commission should you choose to sign up for a program or make a purchase using my link. I won’t ever share a link for a product/service I haven’t tried myself. Read my full disclosure policy here.
Hi friends!
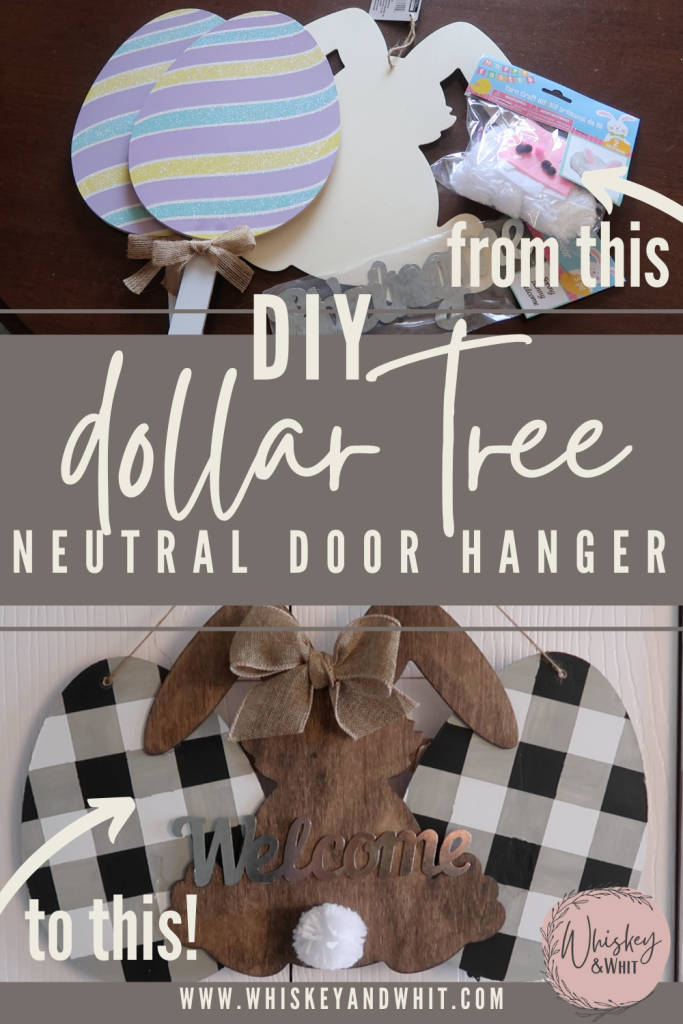
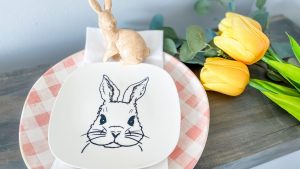
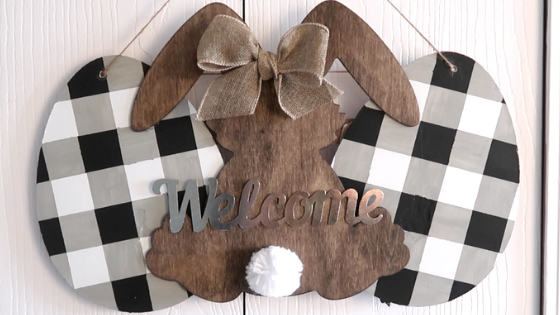
I don’t know about you, but I’m LOVING netural Easter decor. It’s even better when it’s Dollar Tree DIY decor – like this adorable door hanger.
Also in this post, I’m breaking down how I paint the buffalo check pattern by hand, using a super simple simple painters tape technique. Let’s get crafting!
SUPPLIES
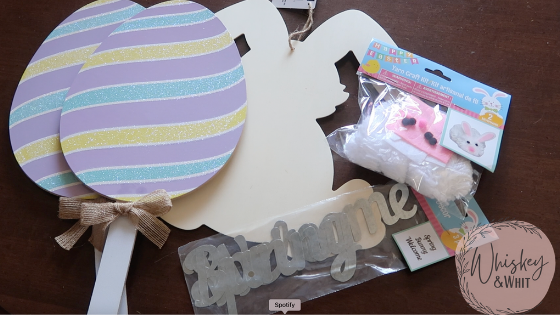
(2) Easter Egg Shapes – Mine are from Dollar Tree and are originally Yard Signs
(2) Wood pieces to stabilize the sign – I used the yard stakes from the egg signs, but you could use Dollar Tree wood rulers or paint stir sticks
Unfinished Wood Bunny – mine is from Dollar Tree
Metal word cutouts – I used ‘welcome’ and it’s also from Dollar Tree
1.5″ painters tape
Dark Walnut Stain – Minwax
Waverly Chalk Paint – White
Waverly Chalk Paint – Black
Waverly Chalk Paint – Gray
Burlap Ribbon – mine is from Dollar Tree
Jute Twine (to hang the sign)
White Yarn (for bunny tail)
TUTORIAL
Step 1 – Gather your supplies, I ended up using a yarn bunny DIY kit from Dollar Tree for the tail, you can do that as well if you’d like.
Step 2 – Take apart your two egg signs by removing the stake from the back. By using a little force, it will easily pop apart. Sand off any roughness on the back, as well as, any glitter on the front.
Then paint both eggs with white chalk paint. Once dry, take your painters tape and tape off event vertical stripes, then paint with gray paint. This portion of the tutorial is very helpful to see in action via the video below.
After your vertical stripes dry on your DIY buffalo check, then remove that tape (set aside – you’ll need it later) and repeat the same steps horizontally. Before painting, I suggest taking a pencil and marking – on the painters tape – where the vertical white stripes are. I mark each side of the strip as well as put an “x” in the center of the strip so I know where to put the tape back later. You can see an example of the marks in the photo below.
Once those stripes are dry – leave your tape – and put the saved pieces of tape back where they were when you painted the vertical stripes. You can use the markings you created as a guide.
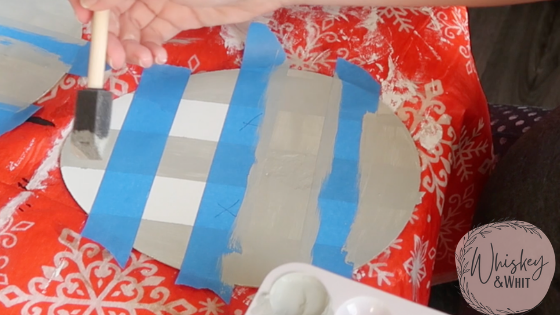
After your tape is back on, paint the open squares black. By putting the tape back in that way – you are essentially marking off everything except where the lines cross – which is where the darkest color (in this case black) should go.
Let your black paint dry about half way, and then remove the painters tape. I’ve found by waiting until it dries completely, you risk ripping up the other chalk paint because it has time to cure to the sign.
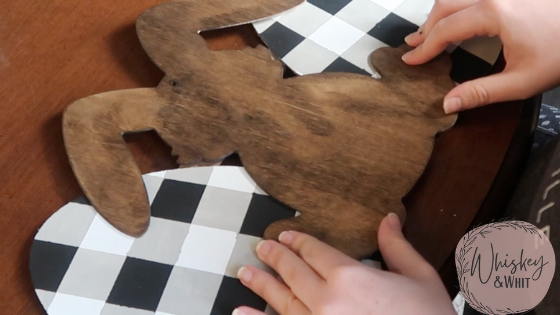
Paint your second egg with the buffalo check pattern and let them dry completely.
Step 3
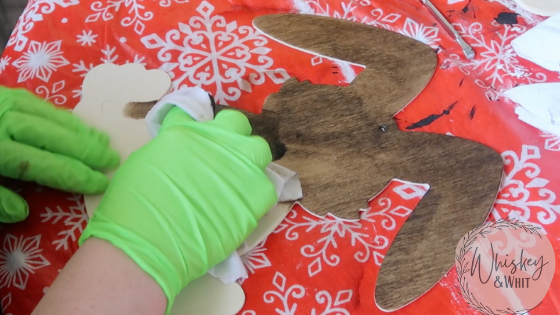
Stain or paint your wood bunny. Most of my home has items stained in Dark Walnut Minwax Stain, so that’s what I chose to use here. Let it dry a minimum of 4 hours before handling it without gloves, if not, you run the risk of staining your hands. 🤦♀️ I’m speaking from experience…
Step 4
Assemble your sign by gluing your two eggs to the steaks you removed from the eggs orignally and then hot glue the bunny to the top of the two eggs as show below.
Finish the sign by adding any embellishments you’d like – I did a fluffy bunny tail, a bow to cover the original hole in the bunny, and the word “welcome.”
Then drill a hole in the top of each egg and string with jute twine to hang.

Check out the tutorial video below to see the entire process in action!
WATCH THE VIDEO TUTORIAL
If you like this look, you’ll also love these other Buffalo Plaid DIY decor pieces I’ve made for Easter.
PIN THIS POST TO SAVE FOR LATER